10 AppleTips to Simplify Your classroom life
Thank you for joining my session and having fun learning tips to be the most productive and efficient teacher you can be! Below you'll find helpful information , including the "How To" videos we created, along with the AirDrop Poster, AirPlay Poster, and some BONUS iPad backgrounds (great for organizing your shared iPads!). Feel free to share the video/s with staff and/or students (the Clips one is especially student friendly!). Enjoy!

![]()

![]()
![]()

1. Trust Apple's Apps
• Apple's apps (including Pages, Keynote, Numbers, iMovie, GarageBand, Clips and more) have amazing features including awesome shapes (that you can make as big as you want to!) and tools like Instant Alpha (to remove backgrounds.)
These apps help you to create powerful, professional files, from spreadsheets, to documents, videos and more.
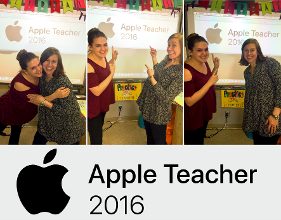
The apps work seamlessly together and once you learn one, the others are very similar and easy to pick up. The Apple Teacher program provides free professional development to teachers. The Apple teacher program showcases the best features of each app. Click here to learn more!
2. Don't forget templates
Yes, I like to start with blank documents too, but have learned (after creating tons of my own!) that the templates are a great first place to start. It is much easier to personalize a template than it is to reinvent the wheel. These can be a huge time saver, and they look great!
3. Use Mail and Calendar
Sync multiple accounts and calendars by using Apple's Mail and Calendar apps. This can really simplify your organization and help you keep everything straight, whether it's for school, extracurriculars, or family.
This also eliminates a couple of tabs in your internet browser, which, if you're anything like the teachers I know....is FULL of different tabs! :)
4. Don't Worry about making it perfect
Often, teachers spend hours editing videos for classroom projects or documents to send to parents. A while back, a presenter gave me permission to stop being perfect and it transformed my teaching. I started using video more, and caring less about the little "ums" I occasionally said. This has opened the doors for me to use tech in my classroom.
4. Use Video
•Clips is an amazingly powerful app. I've used it with students creating as young as 2nd grade, and I've created videos that I use in teaching constantly.
• They're fast and easy to create, and are a fun way to share on social media to keep parents in-the-loop with what's happening in your classroom.
• A great way for kids to show what they know - and they'll have a blast too!
• Instructional videos below! (NOTE: There are two...the top one is the updated version and the second is the original version; I know that some districts don't update right away and wanted to leave the original resource available.)
I also included an overview of Green Screen by Do Ink.
5. Find the hardware/software that supports you
• For me, this was HUGE. Once I got iPad stands in my room my tech use increased significantly. That may work for you, or maybe not - but find what does to make your tech work for you. If it's not fast and easy, it won't happen. Classrooms are busy places!
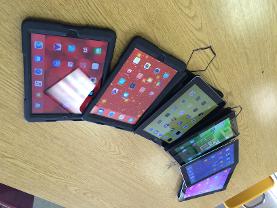
• Click here for a FREEBIE of color-coded wallpaper for shared iPads - this is one way I make the iOS work for me - the wallpaper becomes a fast easy organization system for our shared iPads, the kids remember what color they're on and it's easy for them to tell you the color/number for tracking.
• Here is some of my favorite hardware for Stop Motion
- iPad Gooseneck stand $25 - adjustable in thousands of ways, holds the iPad steady so that the images are all consistent. I also use this stand to take time lapses of students in art.
- Wire Rack $9 - I bought something similar to these for my students to use to create stop motion drawings/videos with paper cutouts. The iPad sits on top of the rack (with the camera aligned in one of the spaces) and the paper is taped underneath it on the table (so that it doesn't move). The way that my desks work, the legs that the rack has were not quite tall enough, so I used Snap Cubes to make the legs taller.
- Headphones with Volume Control Button $12 - Did you know that the volume control button on your headphones will trigger the camera if you're in the camera app (or Stop Motion Studio)? We used the headphones to trigger the image so that the ipad would have no movement from the actual touching of the button on screen. I did this project with wiggly wobbly 4th and 5th graders so this ended up being a crucial tool for our success.
6. Drawing in the apple apps
• Your students can now draw in Pages, Numbers and Keynote! It is possible with just a finger, but even better when using a stylus or an Apple Pencil. This allows them to incorporate their own art into their work instead of just images from the web. Even cooler - in Keynote you can animate your drawing with the "Line Draw" transition, and watch the drawing from beginning to end of it's creation!
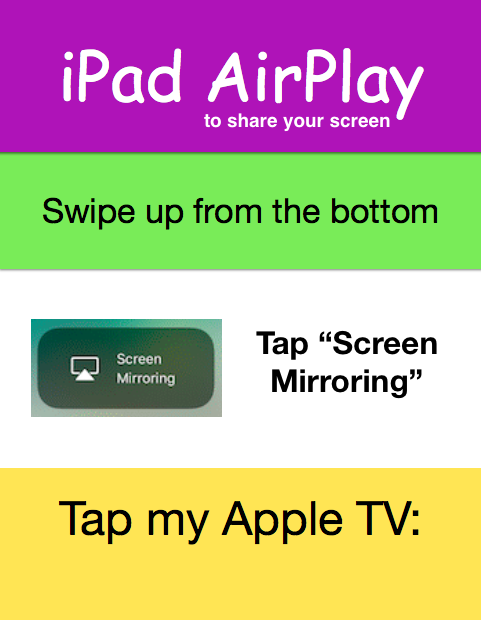
7. Airplay and airdrop
• AirPlay is a great way to have students share work from their own iPads
• It is especially nice for showing work mid-project before turn-in
• Works with Apple TV or the AirServer app on a Mac
• See the FREEBIE Poster
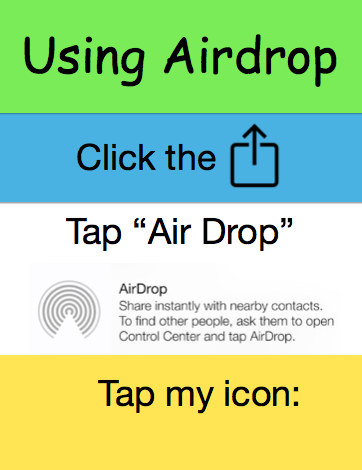
• Simplify your life with AirDrop - there is no reason to email files to yourself/other Mac users with AirDrop - send them the file directly with AirDrop instead!
• Great for sharing files between Mac/iPad/iPhones
• A huge time-saver - makes charging the only real use for a cord! :)
• Poster PDF or Pages doc below!
 Airdrop Poster-ToShare.pdf
Size : 168.686 Kb
Type : pdf
 Airdrop Poster-ToShare.pages
Size : 455.98 Kb
Type : pages
8. Use siri and dictation
• Never underestimate the power of Siri. She can make your life much more efficient in your classroom. With skills like rolling a dice, flipping coins, picking numbers, and my favorite, setting a timer, Siri can make your time with students efficient and fun. I often use the timer when students need to leave for appointments, or are asked to take a break).
Dictation can be a powerful tool when it comes to typing. Students can speak to their device and instantly they get the typing, rather than the "hunt and peck" method of the past.
9. Use Shortcuts
• Here are a few of my favorites!
- Command+z = UNDO
- Command+c = Copy
- Command+v = Paste
- Shift+Command+4 = screenshot
You can also click buttons in the menu to see what the shortcut is for them. You can even create your own!
10. Quick look and spotlight search
Spotlight Search (the magnifying glass in the corner of your menu bar, or the search bar in finder) is your BEST FRIEND.
It can find information from the titles of documents, to words found within the document, etc.
Once the search results come back, click a file and tap the space bar to activate "Quick Look." This will give you a preview of the document without having to open it up.
Additional Helpful Resources
Screenshots/Screen Recording in QuickTime
• These two are vital for teaching tech to kids! You can show them exactly how to do everything before sending them off to work
• iPad and Mac videos below! :)
BONUS:NAMING IPADS

We discussed classroom organization and this file will help you to organize your classroom iPads by changing the backgrounds. Your new backgrounds will each have your name (as a teacher) and the backgrounds are both colored and numbered (they also say the name of the color to accommodate color blind students).

|
10 iPad home screens wallpaper.key Size : 4593.446 Kb Type : key |
